Saturday, July 25, 2015

Bags Big & Small

Since coming back from Spain I have been trying to do some testing and also supply the shop with more bags. I needed to make a bag that was quick and simple to make and would be fairly cheep.
While in Spain to keep myself busy I made some crochet flowers, nothing fancy just some practice and wanted to add them to my bags so I decided on the Phoebe Bag which is a free tutorial that can be found HERE.

I had made the Phoebe years ago in it's original size but this time wanted it larger so I altered the pattern and this is what I came up with.

I used pleather and embellished it with my little crochet flowers.


I love this snail shell bead.


I originally used green ribbon for the flower stalks that came down the bag so it looked like a bunch of flowers but didn't like it so took off the ribbon and did some hand stitching instead.


I love the pink lining.


Looking to make things even more simple and quicker I decided that on the next two I would make the larger size but not add the darts at the bottom which left the bag flat but I think it worked well and I added some thin batting to give it a soft feel. I also added a pocket for a cell phone.


Bright orange lining to tie in with the front pocket.


Same bag, different fabric for the pocket


and lining.


These were so quick to make.  I went and bought more denim fabric to make more but I want to embellish them differently although I suspect these will go well because of the cell phone pocket on the outside.

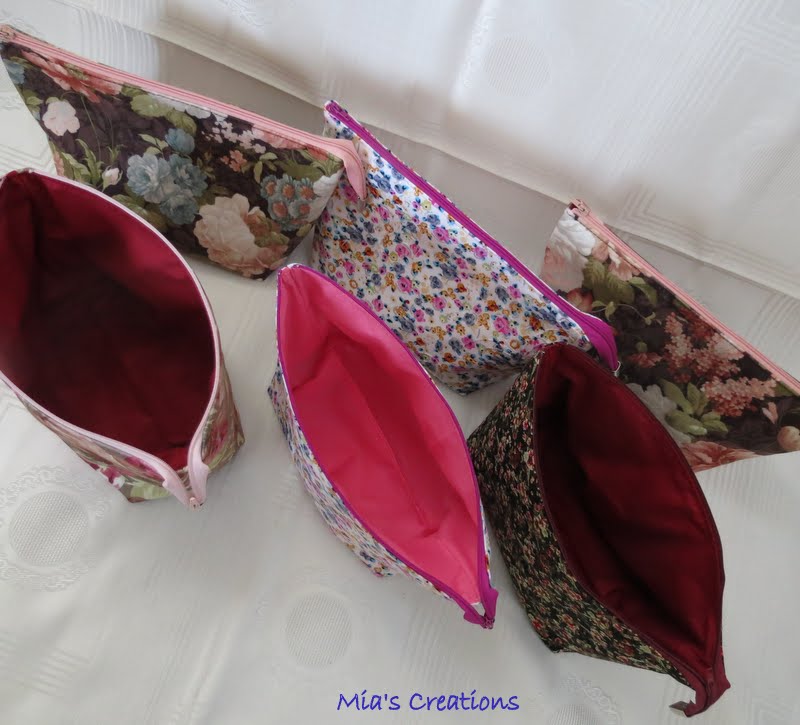
This morning I also made six open wide zippered pouches designed by Anna at Noodlehead. Love this pattern, I made the medium size bag.

The large floral ones are from upholstery fabric and didn't need any interfacing. The other three did as I used quilting cotton.


These were made a few days ago.


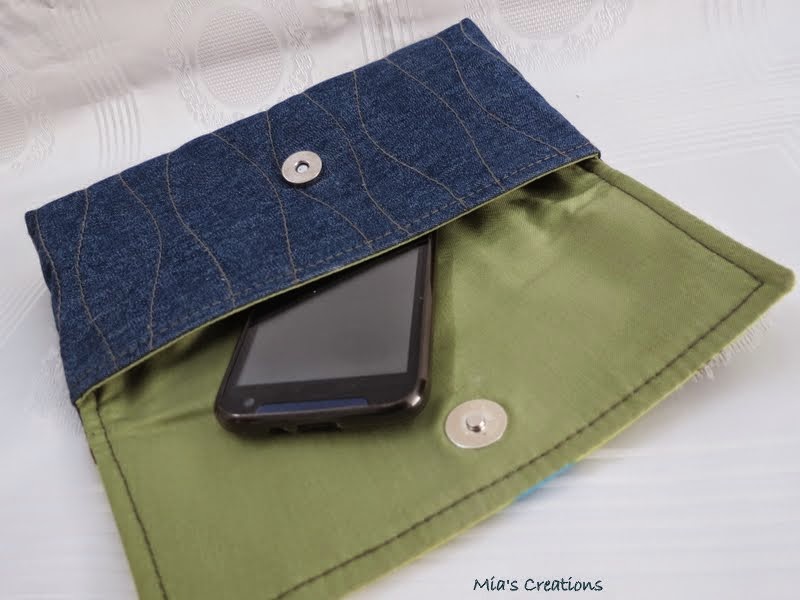
And last of all were four cell phone pouches I made for the shop. I love this floral fabric.


One other bag I made a couple of days ago was a test bag that I can't wait to show you. Designed by the amazing Christine Welsh, her patterns are amazing and this particular one has been revised as the original didn't have pattern pieces. Now it does which makes it quicker to make. I like quick and easy.

Thanks for stopping by.

Happy Sewing.

~ Maria ~

Friday, July 10, 2015

The Sloan Travel Bag

Back in February I tested the Sloan Travel Bag for Sara of Sew Sweetness and I'm late in posting about it as I was in Spain and only had my cell phone to work from, so here it is now.

I was delighted with this bag. I loved how big it was and also liked the fabrics I chose for it. I was worried the orange may be a bit bright but it worked fine.

This bag would be great to use as an overnight bag but could also be used as a laptop bag with loads of room for extras, or as a diaper bag.


The bag is plain on the back but if you are skilled at making bags and comfortable with zippers you could add another pocket here too.


 The Sloan Travel Bag features a 3-dimensinal front pocket.


Everything kept safe with a recessed main zipper.


And I love all the pockets on the inside. One zipper pocket and four slip pockets.


The pattern also includes an elastic key strap in the lining which you can't see on mine because I didn't make one.


The pattern called for padded handles but I just made mine as I would for all my bags without the padding but it would be a good idea to make them that way if you are going to stuff your bag as it can get heavy and the extra padding would be kind on the shoulders.


Love the side pockets, very useful for keeping a cell phone handy or some tissues.


Finished Size: 18” long x 14” tall x 6” deep.

If you'd like to buy the pattern you can get it HERE and if you'd like to see photos of the bags made by the other testers then go HERE.

Happy Sewing

~ Maria ~

Wednesday, July 8, 2015

Glad To Be Back

It's been such a long while since I've posted that it's kind of hard to get back into the habit now but I've missed all of you and your words of encouragement.
So much has been going on from sewing as a business which has been hard work but fun at the same time to having to leave it all behind to visit my dad in Spain who was ill, I was away for a month and a half and managed to spend the first two weeks of that time with my dad before he passed away. Now back home it's time to catch up again and start to pick up from where I left off but first of all I want to say a big thank you to all of you that wrote to me and gave your support while I was away. You are amazing people who have made this tough time so much easier to get through.

So now what to show you. I really don't know where to start as I've made so many things and to be honest my photos are all jumbled up. I managed to put together a collage of all the Open wide Zippered Pouch's I've made since just before March and I was surprised at how many there were. These were made using a free tutorial by Noodlehead which you can find HERE.


I also made quite a few Fallon Bags designed by Karis at CloBird Designs. The pattern has a zipper closure but I simplified it and left it out. You can also make it with a zipper pocket but again for speed and simplicity I made a couple of slip pockets.
This is a very easy bag to make and also very versatile which you can adapt to suit your needs, the pattern also has instructions for two sizes and two strap options and you can buy it from Craftsy HERE.


I also made some test bags before I went to Spain so will have to search for the photos and show you those. Hope you'll stick around now I'm back.

~ Maria ~

Wednesday, April 1, 2015

Happy Bags

Yesterday I showed you Jane's Basic Clutch so today I'm going to show you the Happy Bag I made that matched the clutch and also some other Happy Bags I made during March.
The Happy Bag is designed by Rahimah at Imazzpatterns and she's another designer that makes bags for beginners. Her designs are simple and easy to make and the patterns are very well written with loads of photos.


Here's Jane's Basic Clutch I tested to match the bag.
I love this fabric.


The pattern for the bag has a magnetic button closure but as my customers want zippers in their bags I added a recessed zipper which is very easy to do and can be added to practically any style bag.


Inside has a couple of slip pockets. If you're a confident sewer you could add a zipper pocket on the other side.


As usual I quilt my bags as I don't have fusible fleece so this is a good way of keeping all the layers together.


This one I made with upholstery fabrics. This colour is really in this year.


This is another one I made in the same fabrics just that I positioned the front pocket to show the flowers differently.


Another one in upholstery fabrics. I love these large floral fabrics and they are proving to be really popular.


I also made matching makeup bags for these but I'll show you those another time.

Thanks for stopping by.

~ Maria ~

Jane's Basic Clutch

Boy have I had one crazy month. Actually it's been longer. It all started before the 21st Feb when I was sewing like mad for an upcoming craft fair, you can see that post HERE. Shortly before I was leaving disaster struck when my sewing room ceiling fell down which meant I couldn't make the craft fair, you can see that post HERE. If that wasn't enough to deal with, me and my daughter decided to be the sole suppliers to a shop and if all that wasn't enough we were published in a magazine but more about that in another post.

With all my time spent sewing for the shop and not knowing when workmen would turn up I had to put testing bags on hold, I just wouldn't be able to concentrate. Then Jane from Projects by Jane asked if I wanted to test a clutch and I couldn't refuse becasue her patterns are perfect when they come for testing plus her creations are quick and easy to make. The day after she sent the pattern I had finished it and sent her photos. I told you it was quick.

Here it is, Jane's Basic Clutch. I knew instantly which fabric I was going to use becasue I had just finished making a Happy Bag in the bird fabric which was sent to me by Samantha and thought this clutch would be a perfect addition.


This is a basic clutch but can be made as a conventional clutch like I did with the body in one colour and the flap in another or you can make it like Jane's. She made hers with the back of the clutch and the flap in the same fabric and the front main bag plain.


Inside there is a single slip pocket. Although this may seem like any other clutch Jane has a very clever way of putting the whole thing together which was a new technique to me.


 I used a light denim for the body of the bag and decided to quilt it


 I'm really happy with the way it turned out. Jane's patterns are perfect for beginners with loads of photos and detailed instructions, you just can't go wrong. The pattern is available HERE on Jane's Etsy and while you're there check out the rest of Jane's patterns, they're all fabulous.


I have loads more bags to show you that I've been sewing while you thought I'd disappeared. I've already fallen asleep several times while writing this post so I'll leave the Happy Bag till the next time to show you. For now it's goodnight from me.

Thanks for stopping by.

~ Maria ~

Sunday, March 15, 2015

'Must Have' Shopping Bags

Oh my goodness!!!!!!!!! it's been so long since I last posted and so much has been going on that I haven't had one minutes rest since then. It's a long story so I'll try to make it quick so as not to bore you but I had intended on going to the craft fair with all my things but one night I had dozed on the sofa and was woken by a loud crashing sound. My son was in the kitchen cooking something for himself and the first thought that came to my mind was the cooker had exploded LOLL. After checking on him and seeing everything was fine I heard the loud noise again only this time I noticed it came from my sewing room. I then thought I had left the iron on and it had exploded, a bad habit I have. I went to check and was horrified to see that part of the ceiling in my sewing room had fallen down. The mess was everywhere, on my cutting table where I had been working in my thread draw, everything was a mess. The wet room is above the sewing room and a leak had caused it.

Luckily I have a large sitting room upstairs that was empty and never got used except for a treadmill in it so I set upon the task of moving everything up there. It took a couple of days and left me exhausted. Thinking this was Gods way of telling me to have a rest from sewing I resigned myself to the fact that I should take a break. Well that lasted less than 24 hours and I was back at my sewing machine again. Since then I've been waiting on workmen to show up and my sewing room still needs to be repaired. When it is I don't think I'll be moving back down there again though as I have twice the space in my new room and can't be bothered to move everything again.

Because of this I've had to put testing bags on hold for now as I can't concentrate with all that's going on. Having said that I did accept to test a clutch which is so cute and becasue I know that the designers pattern is so good that it would be easy and quick to test.

Back in February before all this happened I was over the moon to be accepted as a tester by Geta Grama of Geta's Quilting Studio. I've been a follower of her blog for ever and admire her beautiful quilting. She has loads of great tutorials and also makes wonderful bags which are very simple designs but so striking and beautiful. These that I tested are shopping bags, again very simple to make especially compared to what I'm used to making but I believe there is always something that can be learned no matter how simple a project and this was the case with these. Check out the above link where you can see Geta's shopping bags and also a tote bag which is gorgeous and you can buy that pattern too. I can't wait to be able to make one of those.

These are supper quick to make and really easy. The one standing up is made from a waterproof fabric that is from Spain. I bought the fabric ages ago becasue it's in the colours I love and it's from my home country. This one has boxed corners where as the other one doesn't. I've been using them ever since and they are really strong and so handy. I never leave home without them. I just fold them up and put them in my bag.


These bags have no interfacing or lining just an outer fabric but what makes them really nice is all the seams are neatly finished off so there are no raw edges. This is the part that was new to me. I had seen these seams before but had never made them.


This is the inside of the bag. Even the boxed corners have no raw edges. I love how tidy the inside of the bag is. The pattern was really easy to follow with good instructions and clear photos of the steps.

These are great to keep in the car when you go shopping. You could make a whole bunch of them so you don't have to put things into plastic carrier bags. Good for the environment. You can find the pattern HERE. Geta has also made these in faux leather in various colours which you can also see in the link for the pattern and the colours she's used are gorgeous. Also check out all the TUTORIALS. I'm really looking forward to be able to test more bags for Geta in the future. She was looking for testers for her quilt pattern but that was a bit out of my league but who knows maybe one day I'll be good enough to test one of those too.

Thanks for sticking with me to the end of this post. What started out as a disaster has all been for the best. I have a new bigger sewing room and a shop is now selling mine and my daughters work and nobody else's. I'll post about that another time with some photos for you to see. More good news is my daughter has been published in a magazine and her work is on the cover of the first issue. She's been doing tutorials for the magazine and I also did a tutorial for my fabric hearts which has also been published in the same magazine. For those of you who've sent me emails I'm sorry if I haven't managed to get back to you. I'm not on my laptop much these days with all the sewing I have to do but I think in about three weeks to a months time things will slow down a bit.

I've really missed visiting all the blogs I follow and hope to find the time soon to visit those and see what I've been missing out on.

Again thanks to all of you for stopping by.

~ Maria ~